Concrete Contractors
Kansas City
Pool Deck Resurfacing - Repair, Refinish and Seal.
Before and After Pictures
This pool deck resurfacing project began with repairing a section of concrete which had settled after a water pipe leak beneath it.
Once the water leak had been repaired, the home owner wanted the entire damaged concrete section removed.
Therefore, the first portion of this project was to remove the damaged section of concrete and prepare this section for new concrete.
Remove Deteriorated Concrete Pool Deck Section
This pool deck resurfacing project began with tearing out and replacement of a damaged section of concrete.
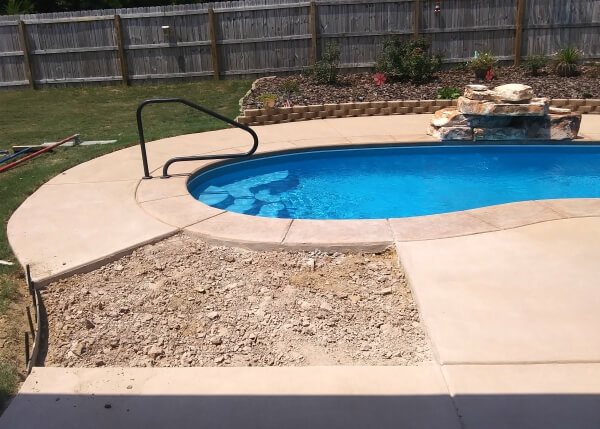
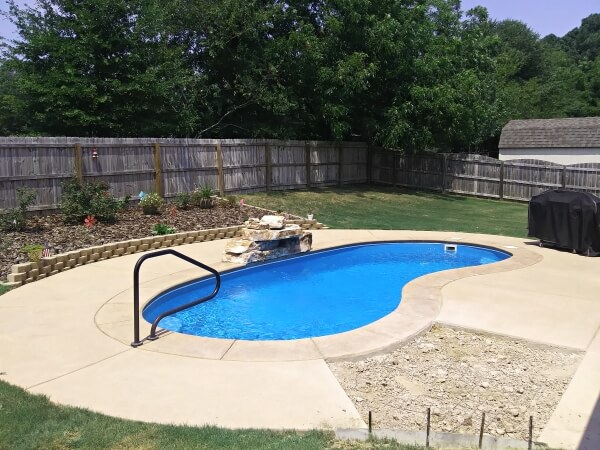
Prepare The Damaged Concrete Pool Deck Section Before New Concrete Installation
Damaged Section of Concrete Pool Deck Has Been Removed and Formed Up For The Installation of New Concrete. In this installation, the section had begun sinking due to a leaking water pipe beneath this section, so, the pipe was repaired by a plumber before the new concrete could be poured.
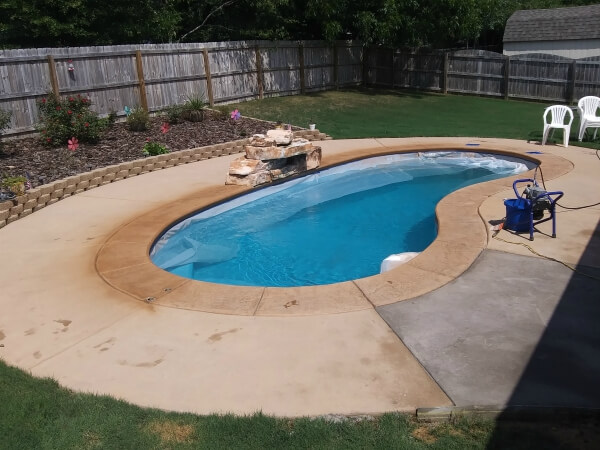
New Concrete Pool Deck Section Poured and Broom Finished
Matching the color of the new concrete pool deck using Integral Color - (Colored Concrete) - New concrete is typically a lighter gray than older, existing concrete. To compensate for this color difference, integral color was added to this concrete mix before the new section of concrete was poured in order to more closely match the color of the older concrete on the existing pool deck before the top surface stain color was applied.
Integral color is not just a colored surface coating like water-based and acid stains. Integral color is an oxide pigment which is thoroughly mixed with the concrete in the ready-mix truck to produce colored concrete. It is available in dry and liquid
form.
Pool Deck Replacement Section Color-Matched To Existing Pool Deck
Tips For D-I-Y (Do It Yourself) Pool Deck Resurfacing
If You Decide To Do It Yourself...
Choose A Two-day Period Without Rain Before Applying Stain
Pressure Wash
- Before stain was applied, the pool deck was pressure washed to remove
any dirt, sand, and debris so that the concrete deck's surface would
accept the stain, uniformly.
Note to DIYs...Pressure
washing provides a much cleaner surface area than using a garden hose.
The water pressure provided by most garden hoses is insufficient to
remove mildew, mold or ground in dirt, or fertilizer acids which are
between the sand particles within the concrete's top surface.
The average water pressure from a home water faucet is about 40 to 80 PSI. PSI is Pounds per Square Inch.
Concrete
contractors use high pressure washers, typically between 2,000 - 3,500
PSI. The pressure washer used on this pool deck was 3,400 PSI. If you
are a Do-It-Yourselfer, commercial-grade pressure washers are available
for rental from an equipment rental store.
Please
keep in mind that stain colors are PERMANENT. Applying stain over
mildew, mold or dirt (even if you can't see any of this debris with the
naked eye) may affect the overall uniformity of color of the stained
concrete surface, and not provide you with your hoped-for results from
all your hard work.
Drying Time - The concrete was then allowed to fully dry for several days.
Stain Coat No. 1
- Terracotta colored water-based concrete stain was then rolled on with
a 5/8" nap roller. Stain can also be sprayed onto a concrete surface,
however, with the pool's interior being in such close proximity to the
concrete which needed to be stained, the stain was rolled on.
The
interior pool coping area (next to the water) was taped off with
plastic, and the stain was hand painted with a brush on the inner coping
area to assure that no stain would get into the water.
Two
coats of stain were rolled on. The first coat was rolled in one
direction, only. As an example...it was rolled (north to south), and
allowed to fully dry to the touch.
Stain Coat No. 2
- The second coat was rolled on in the opposite direction, (east to
west). (The north-south and east-west directions are only to help
explain the two cross-hatched directions in which the stain was rolled
onto the concrete. You will not need to use a compass.)
Two coats of stain were applied in order to assure that the stain fully and evenly covered the concrete's porous surface to prevent unwanted light and dark areas.
Note: It is not recommended for D-I-Y homeowners to attempt to match the underlying stain on the replacement concrete section before applying the final stain to the entire pool deck. For best results, contact a professional with experience in color-matching.
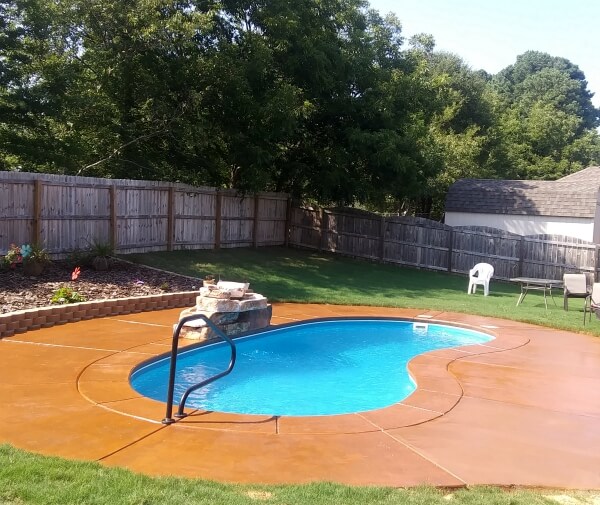
Pool Deck Resurfacing After Sealant Applied
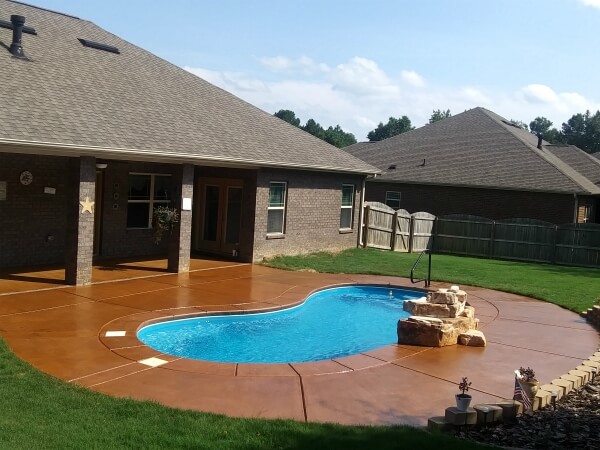 Pool deck resurfacing project is completed. Pool deck and patio are stained with Terracotta color stain.
Concrete Pool Deck Sealer
Sealer Tip: Concrete absorbs heat. Sealer should be applied when it is cool, such as in the early morning or early evening. If applied during the heat of the day, the sealer may "flash", and create an unwanted coloration.
Two coats of sealer were applied. The first coat was rolled on in the north-south direction and allowed to dry. Depending on the temperature and humidity, this may take between 2 hours and 24 hours.
The first coat of sealer must be dry to the touch (not sticky) before the second coat is applied.
The second coat of sealer was rolled on in the east-west direction, and allowed to dry.
A non slip concrete sealer additive for pool decks was mixed with both coats of sealer for slip resistance.
If you would like a quotation to have your pool deck resurfaced, and you live in the local Kansas City Area, please use the Request For Quote form, below.
Do It Yourself?
If you would like to perform your own pool deck resurfacing to stain and seal your pool, yourself, the following information contains the timeline, materials and equipment that you will need to help you decide.
The Do It Yourself list below, does not include removing and replacing the deteriorated section of concrete above the underground water line with a jack hammer, nor the adding of integral color pigments to the new, replacement section of concrete to match the existing concrete pool deck's color because these are typically not a Do-It-Yourself project.
DIY - Staining and Sealing For Pool Deck Resurfacing
Materials Used
Terracotta colored water-based concrete stain.
Measure your pool's deck surface area to determine the correct amount of concrete stain and 2 coats of sealant.
Equipment Needed
Pressure Washer
Garden hose to attach to pressure washer
Tape - 3 rolls of blue tape
Plastic sheeting - 1 roll
Scissors or Exacto Knife
Brush - (2) - 4" brushes
1 Roller handle
4 Roller covers with 5/8" nap
Time Spent on This Pool Deck Resurfacing Project
Concrete Section Removal and Replacement: One day
Interior Pool Coping Taped Off with Plastic: 2-3 rolls of tape, 4 hours
Pressure Washing Time: 3.5 hours
Drying Time: 3 hours
Staining Time - 1st Coat: 3 hours
Drying Time: 2 hours
Staining Time - 2nd Coat: 2 hours
Drying Time: 2-3 hours (until dry to the touch)
Sealing Time - 1st Coat: 2 hours
Drying Time: until dry to the touch
Sealing time - 2nd Coat: 1.5 hours
Our Kansas City, KS Service Area
If you are looking for "Concrete contractors near me", here is the list of cities we service.
Concrete Contractors Kansas City KS - Serving the Kansas Cities of:
Basehor, Bonner Springs, Edwardsville, Fairmount, Kansas City, KS, Lake Quivira, Lansing, Leavenworth, Maltby, Mission, Overland Park, Piper, Roeland Park, Shawnee, Stone, and Tonganoxie, Kansas.
Serving the Kansas Counties of:
Johnson, Leavenworth, Wyandotte
Concrete Contractors Kansas City KS - Serving the Missouri Cities of:
Farley, Ferrelview, Hampton, Parkville, Platte Woods, Riverside, Weatherby Lake, Missouri.
Serving the Missouri Counties of:
Platte

